Connect with us

Technology

Stop Wifi Turning Off Android ( WiFi Turns Off By Itself On Android )

Published

on

stop wifi turning off android

I thought it was interesting enough to study during my undergraduate years, so I enrolled in a networking course. This is exactly why I did not pursue a career in networking. I can’t stand when my network is having issues.

I suppose it’s because I get anxious whenever my Internet connection seems to be in jeopardy, which is pretty often. In addition, poltergeist-like activity is a distinct possibility. Such as the issue of one’s Wi-Fi randomly turning on and off. 

stop wifi turning off android

While in the midst of performing some action, you find that you are suddenly disconnected. After that, it comes back around. So, what exactly is causing this wifi issue, and how can it be fixed? Some people have taught me how to solve networking problems naturally.

Why God, Why? – Reasons of Wifi Turning Off And On Issue:

There is no simple explanation for why Wi-Fi connectivity drops in and out; like most things in life, it is more nuanced than that.

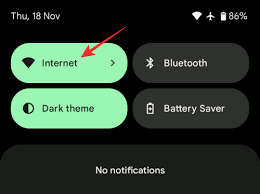
Your device’s Power Mode may be disabled in an effort to conserve power by disabling Wi-Fi. When it detects that you aren’t using it, some modes will power it down automatically. To find out, go ahead and check and play around with these options.

Power management options like these may be found in some antivirus programs.

Do you have a connection with anyone else on that network? Inquire as to whether or not they are having the identical difficulty. Alternatively, can you log into more than one network simultaneously? Do you have the same problem with your device on every network?

Related Search:

These questions will help you narrow down whether the issue is with the network or your Android device. Could there have been a sudden change in circumstances that brought on this occurrence? Have you downloaded any new programs or altered any preferences? 

Reasons of wifi turning off android

Both the Connection Optimizer and the Smart Wi-Fi options in your mobile network settings can be used to automatically activate Wi-Fi. Keep Wi-Fi on during sleep must be enabled (or deselected) and the Network Switch must be turned off.

When It’s The Network

Do you hear similar gripes from your other household members or roommates? You should try restarting your router, which you have probably already done. A problem with other wireless signals on the same frequency could be to blame if you don’t encounter the same issue when using a wired connection.

Interference with Wi-Fi signals can come from a variety of devices, such as neighbouring routers, mobile phones, microwaves, and even some computers. Another possibility is that the router’s firmware is outdated and needs to be updated. 

Does your router keep powering on and off, or are you just experiencing buffering? You may just have a slow connection if your videos have to buffer repeatedly. In the place of “why does my Wi-Fi keep turning on and off by itself?” your provider should be asked why the connection is so slow.

If It’s Your Android

Be sure to check your Android’s Wi-Fi settings, and while you’re there, disable Wi-Fi Notification by going to Settings > Wireless & Networks > Wi-Fi > More > Advanced. If your home’s signal is particularly weak, you may want to consider installing a signal booster.

Try clearing the Android cache as well. Most devices have a Recovery Mode that can be used for this purpose, though the specific key combination required to enter this mode will vary.

Be sure to perform the obligatory Android reboot. Keep Wi-Fi Alive is an app available on Google Play with the express purpose of resolving this issue.

stop wifi turning off your  android

Any WiFi-fixing apps should be turned off or deleted. Sometimes updates wreck Wi-Fi connectivity. It could be due to a bug, but in many cases it’s just a matter of adjusting a few preferences.

Wi-Fi Repair Tool, Available for Download

As an example, some people have reported problems with Marshmallow’s Doze feature. To prevent the Wi-Fi connection manager from being affected by Doze, go to Settings > System > Battery > More > Optimize Battery Usage and add the app to the list of Apps not optimized that relies heavily on Wi-Fi.

Verify that you’ve disabled Mobile Data by turning it off twice. There’s also the drastic measure of resetting everything to factory settings.

Other Helpful Advice

The wireless channel you are using may be overcrowded. Manually changing to a more spacious channel is possible, as is using an app like inSSIDer to automatically hop to a different, more open channel.

stop wifi turning off android helpful Advice

While doing so, make sure to turn off any Wi-Fi management apps your service provider has installed. Try using an open router (Wait; don’t get too worked up just yet; a security recommendation is coming!) to reduce interference while keeping your data safe.

Related Search:

Rather, restrict users’ ability to access the router based on their MAC address. Finally, make sure that you are not too far from the router, resulting in a weak signal.

FAQs – People Also Ask

Why does my Android automatically turn off Wi-Fi?

Features that conserve power use

Putting your device into battery saver mode may disable your wifi. When you need to use it again, it may take a while for it to turn back on. Even when your phone is in sleep mode, this can happen. The wi-fi connection may have been disconnected from your Android device because of its battery saving settings.

Why does my phone not stay on Wi-Fi?

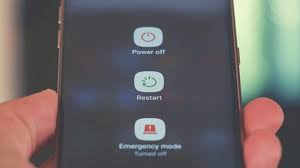
Simply restarting your Android phone or tablet may resolve the issue you’re experiencing. Restart the Router:

 It’s best to unplug the router, wait 30 seconds, and then plug it back in before trying to connect your phone to the WiFi network. Try restarting your phone: If your phone isn’t working, try turning it off, holding the “power” button, and then turning it back on.

For More Entertainment & News Related Articles, You Can Check Our Website: Velvetiere.com

Sophia Here, Lead Co-Editor of the Velvetiere News Website. Basically It was literally coincidence to get into copywriting and working as a Content Editor for more than 7+ years in a big MNC firm. I've gained good experienced and skills so that i can share it with you guys. You will get daily fresh and updated world-wide news, it's my promise!

Continue Reading
Click to comment

Leave a Reply

Your email address will not be published. Required fields are marked *

Technology

Get Ready for Redmi 14C 5G: 12GB RAM, 5160mAh Battery, and More Features Coming Soon

Published

on

redmi14c

Xiaomi is set to launch its latest smartphone, the Redmi 14C 5G, in India on January 6, 2025. This new device aims to capture the attention of tech enthusiasts and everyday users alike with its impressive specifications, including a massive 5160mAh battery and the capability to support up to 12GB of RAM. The Redmi series has always been known for offering great value for money, and the Redmi 14C is expected to continue this trend with its powerful features and competitive pricing.

The Redmi 14C 5G is designed not only for performance but also for aesthetics. It boasts a unique “Starlight” design that reflects the beauty of the cosmos, available in multiple color options such as light blue, black, and a dual-tone grey and dark blue. With a focus on delivering a high-quality user experience, Xiaomi has integrated advanced technology into this device, ensuring it meets the demands of modern smartphone users.

In this article, we will explore the key specifications, features, and expected performance of the Redmi 14C 5G, providing potential buyers with all the information they need before its launch.

Redmi 14C 5G: An Overview

The Redmi 14C 5G is packed with features that make it a strong contender in the budget smartphone market. Below is a comprehensive overview of its specifications:

FeatureDetails
Display6.88-inch HD+ (720×1640)
ProcessorMediaTek Helio G81
RAM OptionsUp to 12GB
Storage OptionsUp to 256GB (expandable via microSD)
Rear Camera50MP primary camera
Front Camera13MP selfie camera
Battery Capacity5160mAh
Charging Speed18W fast charging
Operating SystemAndroid 14-based HyperOS

Key Features of Redmi 14C

  • Display Quality: The Redmi 14C features a large 6.88-inch display with a resolution of 720×1640 pixels, providing an immersive viewing experience perfect for media consumption.
  • Performance: Powered by the MediaTek Helio G81 processor, this device ensures smooth performance for everyday tasks and gaming.
  • Camera Capabilities: The smartphone includes a robust 50MP rear camera, allowing users to capture high-quality images with AI enhancements. The front camera is equipped with a 13MP sensor, ideal for selfies.
  • Battery Life: With a substantial 5160mAh battery, users can expect extended usage without frequent recharging. The phone also supports 18W fast charging, which helps in quickly powering up the device.
  • Connectivity Options: The device supports dual SIM functionality with dual 5G support, ensuring users can take advantage of faster network speeds.

Design and Build Quality

The design of the Redmi 14C is both modern and stylish. It features:

  • A sleek body that measures approximately 171.88 x 77.80 x 8.22 mm, making it comfortable to hold.
  • A weight of around 211 grams, which is manageable for daily use.
  • Multiple color options that cater to different tastes, including Dreamy Purple, Midnight Black, Sage Green, and Starry Blue.

Software Experience

Running on Android 14 with Xiaomi’s custom HyperOS, the Redmi 14C promises an intuitive user interface along with various customization options. This operating system enhances multitasking capabilities and improves overall performance.

Performance Specifications

To further understand what makes the Redmi 14C stand out in terms of performance, let’s delve into its specifications:

  • The device will feature configurations ranging from 4GB to up to 12GB of RAM, allowing users to choose based on their multitasking needs.
  • Storage options will include variants with up to 256GB internal storage, expandable via microSD card for additional space.

Camera System

The camera system on the Redmi 14C is designed to cater to photography enthusiasts:

  • The rear camera setup includes a primary 50MP sensor that captures detailed images even in low light conditions due to its f/1.8 aperture.
  • Additional features such as HDR and AI enhancements allow for better image processing.
  • The front-facing camera offers a resolution of 13MP, equipped with night mode capabilities for improved selfies in dim lighting.

Battery Performance

One of the standout features of the Redmi 14C is its battery life:

  • With a capacity of 5160mAh, users can expect up to 21 days of standby time or around 42 hours of voice calls.
  • The inclusion of an efficient battery management system ensures longevity and safety during charging.

Connectivity Features

The Redmi 14C includes various connectivity options:

  • Supports dual SIM functionality (Nano-SIM) allowing users to manage two numbers seamlessly.
  • Connectivity features include Wi-Fi, Bluetooth v5.3, GPS, NFC (region dependent), and USB Type-C port for charging and data transfer.

Additional Features

The phone also comes equipped with several sensors including:

  • Accelerometer
  • Ambient light sensor
  • Proximity sensor
  • Fingerprint sensor for enhanced security
  • Face unlock feature for quick access

Conclusion

In summary, the upcoming launch of the Redmi 14C 5G on January 6, 2025, promises an exciting addition to Xiaomi’s lineup of smartphones. With its impressive specifications such as up to 12GB RAM, a powerful battery capacity of 5160mAh, and advanced camera features, it aims to deliver exceptional value at an affordable price point.

As consumers await its release, the anticipation builds around how well this device will perform in real-world scenarios compared to competitors in its class. Whether you are looking for a reliable smartphone for daily use or something that can handle more demanding tasks, the Redmi 14C could be worth considering once it hits the market.

This article has provided an overview of what potential buyers can expect from the Redmi 14C upon its launch. With its blend of performance, design, and affordability, it stands poised to make waves in the Indian smartphone market in early January.

Continue Reading

Technology

DGme Login Guide: Accessing Your Dollar General Employee Portal

Published

on

By

DGME Portal Login

Managing work-related information has never been easier for Dollar General employees, thanks to the DGme portal. It’s a one-stop online platform that simplifies how staff access their employment details, from pay stubs to training resources.

Navigating the intricacies of employee benefits and pay can be daunting, but with DGme, it’s all at your fingertips. Whether you’re clocking in for the first time or a seasoned member of the team, I’ll guide you through the essentials of using this handy portal.

What is DGME Portal

When I first joined Dollar General, the DGME portal stood out as a central hub for my work-life management. DGME, short for Dollar General My Employee, is more than just an online tool; it’s an essential resource for staff across the company.

Employees like me frequently use the portal to access a wealth of employment details that are critically important.

The platform is designed with a user-friendly interface, making it straightforward for users of all skill levels. Whether you’re a seasoned staff member or new to the team, navigating DGme is intuitive.

On this portal, employees can find their pay stubs, tax forms, benefits information, and training resources. What’s more, these resources are available 24/7, making it convenient to manage personal details outside of work hours.

Accessing my employment information requires logging in with a Dollar General employee ID and password. For employees like me, keeping track of payment documents is incredibly simple. I can view both current and previous pay stubs, as well as download or print them for my records.

Here’s a quick guide I’ve found useful:

  • Viewing Pay Stubs: Typically available a few days before payday, allowing employees to plan their finances effectively.
  • Updating Personal Information: Easily change address, contact details, and emergency contacts through the portal’s personal information section.
  • Benefits Management: Check eligibility, coverage details, and claim status for various benefits including health and wellness resources.

Remember, managing personal details is directly in your hands with DGme. If there’s ever an issue with a forgotten password or other login problems, there’s no need to worry. The “Forgot Password” link on the login page and support from the HR department is there to help every step of the way.

Overall, the ease of accessing and managing work-related information through DGme enhances efficiency and streamlines the employee experience at Dollar General.

How To Login into DGME Portal

When I need to access my work-related information at Dollar General, I head over to the DGme portal.

Logging in is a breeze, and I’ll walk you through the process step by step. First off, I make sure I have my Dollar General employee ID and my password ready.

DGME Portal
  • I visited the DGme Login page.
  • Here, I enter my credentials carefully.
  • For employees logging in for the first time, there’s a registration or setup process that’s straightforward and guided by clear instructions.
  • Sometimes I might forget my password, which is pretty common.

Thankfully, there’s a “Forgot Password” link right at the top of the login page. I click on it, and the portal leads me through a secure process to reset my password. A few pieces of my personal information are needed, like:

  • Employee ID
  • Last four digits of my SSN
  • Date of Birth (DOB)

Once I fill in these details, the portal verifies my identity, and I’m given instructions to create a new password. It’s important that I remember this new password or write it down in a safe place.

After resetting my password, I head back to the login page and try it out to make sure it works. Access is now a fingertip away, and I can dive into the range of features that DGme offers, like checking my pay stubs, accessing tax information, managing my benefits, and utilizing training resources.

Understanding how to navigate and use the DGme portal is crucial for me as a Dollar General employee. It ensures that I stay informed about my work-related details and have access to the necessary information whenever I need it.

How to Signup at DGME

Signing up for the DGME portal is easy and I’ll guide you through the process right here. If you’re a new user, the first step is to visit the official DGme website.

Don’t worry about being directed elsewhere during the process—the registration page may look similar to the password reset page, but it’s just as secure and user-friendly.

Here’s a quick rundown of the registration steps:

  1. Navigate to the official DGme page.
  2. Enter the required information such as your employee ID, Date of Birth (DOB), the last four digits of your Social Security Number (SSN), and your legal first name.
  3. Once you’ve filled in the details, press the submit button.
  4. Follow any onscreen instructions to complete the creation of your new account.

Obtaining an employee ID and password is paramount since these credentials are your key to accessing the DGme portal. After you’ve finished setting up your account, you’re ready to dive into all the features the portal offers—like viewing paystubs, managing benefits, and accessing critical tax information.

How To Reset Password of DGME Portal Login

Sometimes, keeping track of passwords can be challenging, and I’ve found that forgetting a login credential is a common hiccup for many.

If you’re facing issues with your password on the DGme portal, don’t worry; I’ll guide you through the password reset process step by step. It’s a quick and secure way to regain access to your account.

Forgetting the password is something any of us can easily do. Here’s what you need to do to reset it:

  • Go to the DGme login page: Click on the “Forgot Password” link located prominently at the top.
  • Fill in your details on the recovery page: You’ll need to provide specifics such as your employee ID, the last four digits of your SSN, and your date of birth (DOB).
  • Account verification: After submitting the information, the portal will search for your account. You’ll be given additional steps to follow.
  • Reset and confirm: Once you’ve reset your password, head back to the login page and try logging in with your new password to ensure it works.

But what if you’ve forgotten both your employee ID and password? It’s not as daunting as it seems. Just like with forgetting your password, there’s a procedure in place to help you recover your employee ID as well. Usually, there will be instructions on the DGme portal to guide you through the recovery of both your employee ID and password.

Remember, always use a strong, unique password for your accounts to maintain security. After you’ve successfully reset your password, you’ll be able to manage your employment information seamlessly once again.

Features of DGME Portal

When navigating the DGme portal, I’ve discovered that the online tools provided are comprehensive and user-friendly. Multiple features are at my fingertips once I’ve logged in using my Dollar General employee credentials. I’ll delve into some of the key functionalities offered on the platform.

Employee Self-Service

One of the essential features is Employee Self-Service (ESS). Through ESS, I’m in control of my personal and employment information. This self-service feature is a big time-saver since I can manage various tasks without needing to liaise with HR directly. I can:

  • View and download my pay stubs, which are available before payday
  • Access and print my W2 and other tax forms
  • Update personal details such as address, contact info, and emergency contacts
  • Enroll in or change my benefit elections with a few clicks

By streamlining these processes, DGme empowers me to manage my work information efficiently.

Training and Development

Investing in growth is crucial, and the DGme portal excels here by providing Training and Development opportunities. I can access:

  • A library of resources to improve my skills
  • Training modules tailored to my position within Dollar General
  • Progress tracking features that allow me to stay on top of my learning goals

These resources are designed to help me excel in my current role and prepare for future opportunities within the company.

Time and Attendance Tracking

Lastly, the DGme portal is instrumental in Time and Attendance Tracking. This functionality makes it easier for me to:

  • Check my work schedule anytime, from anywhere
  • Monitor my attendance and punctuality
  • Keep track of my hours worked and plan my time accordingly

All this data is compiled in an intuitive interface, ensuring I stay informed about my work schedule and attendance history.

Through each of these features, the DGme portal provides a secure and seamless way to manage my employment information, enhancing my work experience at Dollar General.

Conclusion

Navigating the DGme portal is straightforward once you’re familiar with the login process and its robust features. As a Dollar General employee, you’ll find that managing your work-related information is a breeze.

From updating personal details to keeping track of your work schedule, the portal empowers you to take charge of your employment data efficiently.

Remember to safeguard your account with a strong password to maintain the security of your information. With these tools at your disposal, you’re set to make the most of the resources available through DGme.

Continue Reading

Technology

Ios Screen Recorder Guide ( Don’t Know How To Record Screen On IPhone Or IPad? )

Published

on

By

ios screen recorder guide

If you want to demonstrate how an app works on your iPhone or show someone how to do something on their iPhone, recording your screen can be a useful tool. You may be wondering how to take a screenshot on your computer.

In this article, you will learn not only how to record your iPhone’s screen, but also how to record the audio from your screen and edit the recording.

Before iOS 11, it was a hassle to record an iPhone’s screen, so it’s no surprise that a lot of people look for guides on how to do it. Here are the top 5 iPhone screen recorders that you can use right now.

ios screen recorder guide

Though the ability to record one’s phone’s screen has been around for some time, Apple’s mobile devices were noticeably slow to adopt the feature. With iOS 11, Apple mobile phones are capable of recording their own screens.

However, the built-in iPhone screen recording software isn’t always professional or user-friendly, so we put more than ten iPhone screen recorders through their paces and picked out the five best ones.

Best GIF Screen Recorder 

1. Make a recording!

Software compatibility: iOS 11 and later

Device Compatibility: iOS Devices

Record it screen recorder is a top-rated iPhone app that lets you easily record your screen to use as a tutorial, share apps and games, create video demonstrations, or create training videos. 

Quickly edit together a polished video by recording your iPhone’s screen and then adding in some video reactions complete with audio. For longer video sharing, you’ll need to upgrade to the Pro version, which only costs a few dollars more.

2.ApowerREC Compatible with iOS 10 and later versions

Compatible with iOS devices

ios best gif screen recorder

When you download ApowerREC, an iOS app that is available for free, you can record any activity that takes place on your screen, including games, live streams, and video chats.

 It can record your entire screen without adding a watermark, and it has an easy interface for managing your recorded videos. Additionally, the recorded video can mirrored and swiftly streamed onto a larger screen.

Finally, 3.DU Recorder is compatible with iOS 11 and later versions.

Those with an iOS device, including an iPhone, iPad, or iPod touch, can use it.

DU recorder is an excellent screen recorder for iOS devices. In addition to recording games, live shows, sports, and more, DU recorder also allows you to stream your screen to platforms like YouTube, Facebook, and Twitch.

Live recordings can made public, private, or unlisted, and both external microphones and internal audio can recorded at the same time. And you can send it via email, Airdrop, etc.

Fourthly, GoRecord requires iOS 11 or later. Those with an iOS device, including an iPhone, iPad, or iPod touch, can use it.

Related Search:

Go Recorder is an all-in-one screen recorder, face camera, and editor that makes recording your iPhone’s screen, including apps and games, a breeze. 

Create screencasts with ease and share them on YouTube or your photo album. Furthermore, you can easily edit your iPhone screen recordings and use Face Cam to add a reaction to your recordings.

Setting Up Screen Recording

In spite of how simple screen recording is, you’ll need to enable it in the Settings menu.

1: Activating screen recording requires navigating to Settings > Control Center.

2: Locate Screen recording in the list of additional controls and press the green Plus sign (+) that appears next to it.

Best Screen Recorder for iPhone (& HOW to Record iPhone Screen!)

3: You should now see a Screen record icon in the Control centre, which you can access by swiping up from the bottom of the screen (or down from the top right edge, if you’re using an iPhone X, iPhone 11, iPhone 12, or iPhone 13), depending on your model.

Recording Your Screen

Thanks to Apple, it’s easy to record your screen. First, launch the Settings menu and select the Screen record icon.

Second, you’ll have three seconds to dismiss the Control Center after tapping it before your phone begins recording. The recording process indicated by a red bar at the top of the screen.

Third, press harder than normal on the Screen record icon (3D Touch) to access additional audio recording controls. There is a sudden appearance of a menu bar in the middle of the display.

record your screen on Iphone

To begin recording in Step 4, select the Microphone icon and then tap the Start button. Fifth, when done recording, tap the red timer at the top of the screen to immediately stop the recording.

You can access your video by tapping the notification that reads “Screen recording video saved to Photos” in the Notifications tray. To end a recording, you may also access the Control Center and select the Screen record icon there.

Editing A Screen Recording

The app will automatically save the recorded screencast to your phone’s Photos app once you’re done. In the status bar, you should see the message Screen recording video saved to Photos.

  1. You can start watching the video right away by tapping on the alert. Alternatively, you can access the file in the Photos app for further editing.
  1. The second step is to edit the recording in the Photos app as you would any other video. To edit the video, launch Photos and click the Edit button in the app’s upper-right corner.
  1. Third, you’ll notice a slider bar beneath the captured window. Toggles at both ends of the slider isolate individual frames for modification. To modify the start and end times of your screencast, simply use the toggle bars.
Editing ios screen recording guide
  1. Fourth, when you’ve made all the necessary changes and are happy with the result, tap the Done button.

Related Search:

  1. The fifth and final step is to save your progress. When you’re finished making changes, tap Save as new clip to exit the editor.

Final Words

The App Store stocked with third-party apps that can supplement the capabilities of the default screen recorder, such as Go Record: Screen Recorder, ApowerREC: Record Screen, and Screen Recorder, Screen Capture.

Apps like this are great substitutes for Apple’s rudimentary screen recording features.

Continue Reading

Trending